Creation of a New Database
| Step 2 | Create the RMS database. Right click on "Databases" and select "New database". 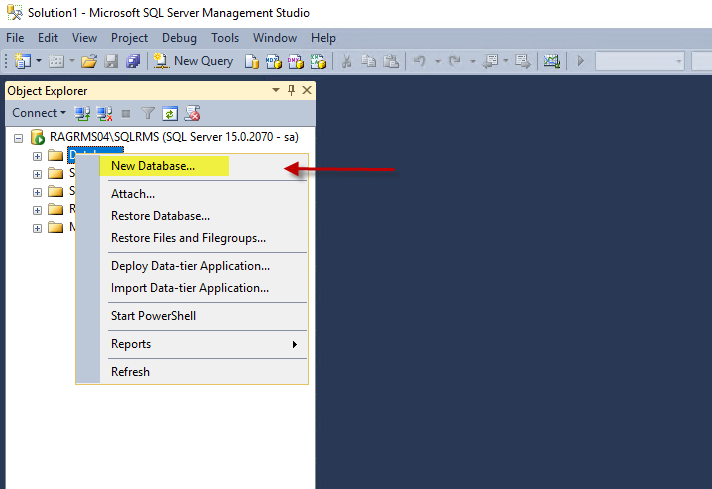 |
|---|---|
| Step 3 | Add the database name: rms. Set the initial Size (MB) to 128 MB 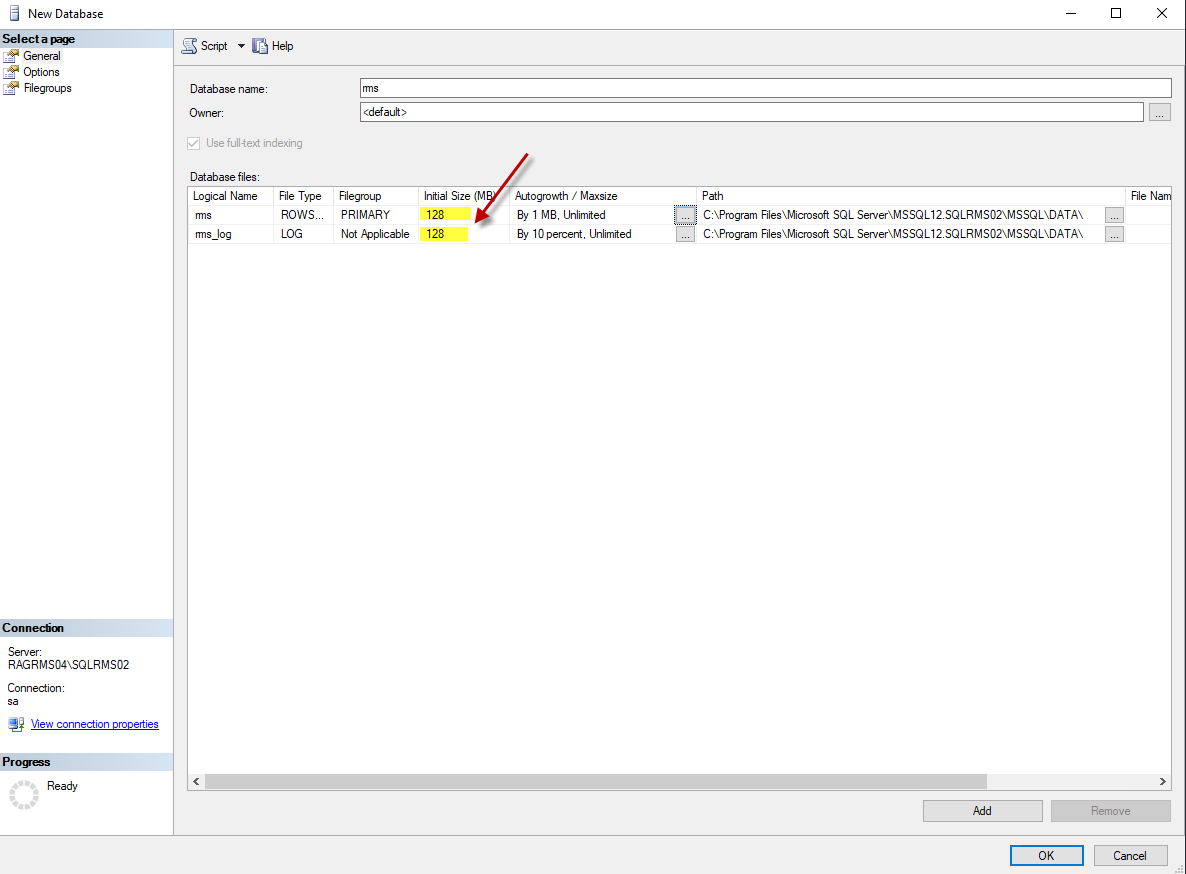 |
| Step 4 | Move to Autogrowth / Maxsize and edit the field to 128MB, for rms and rms_log: 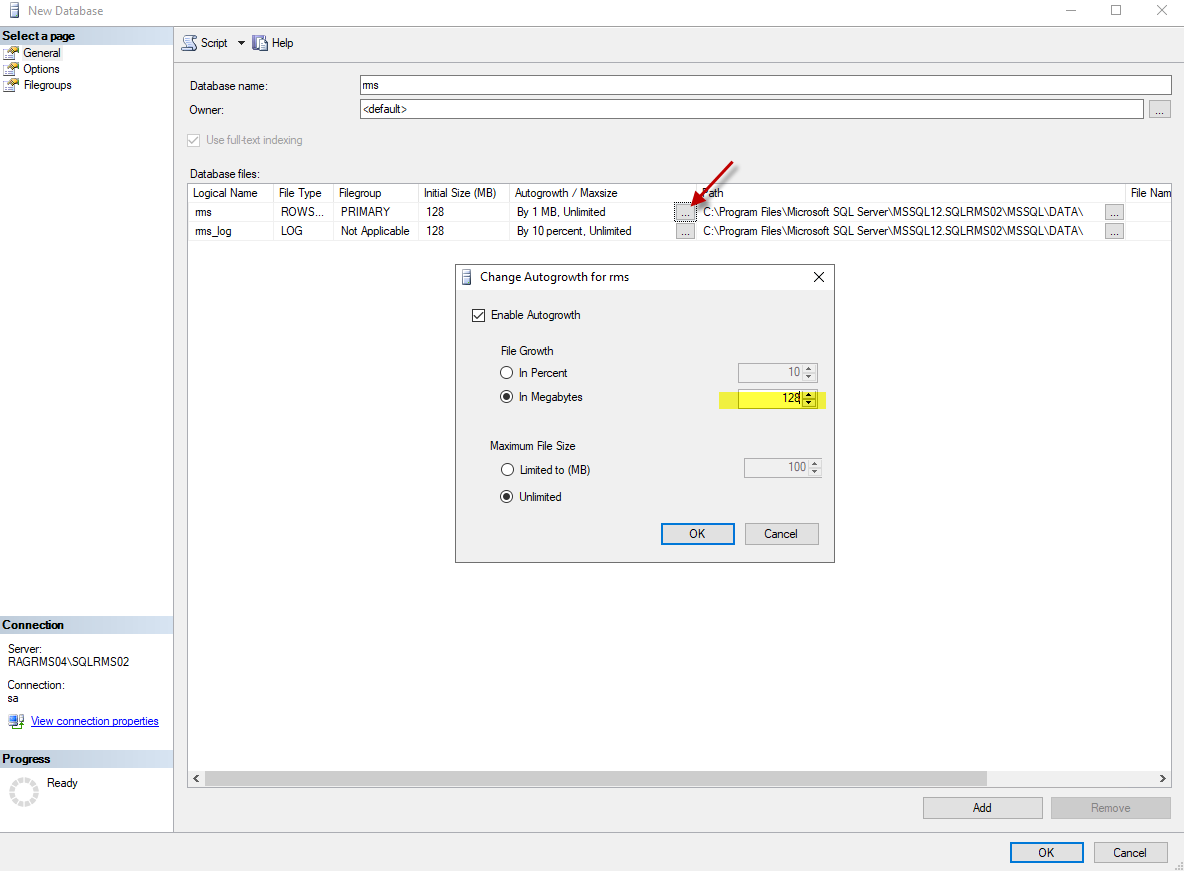 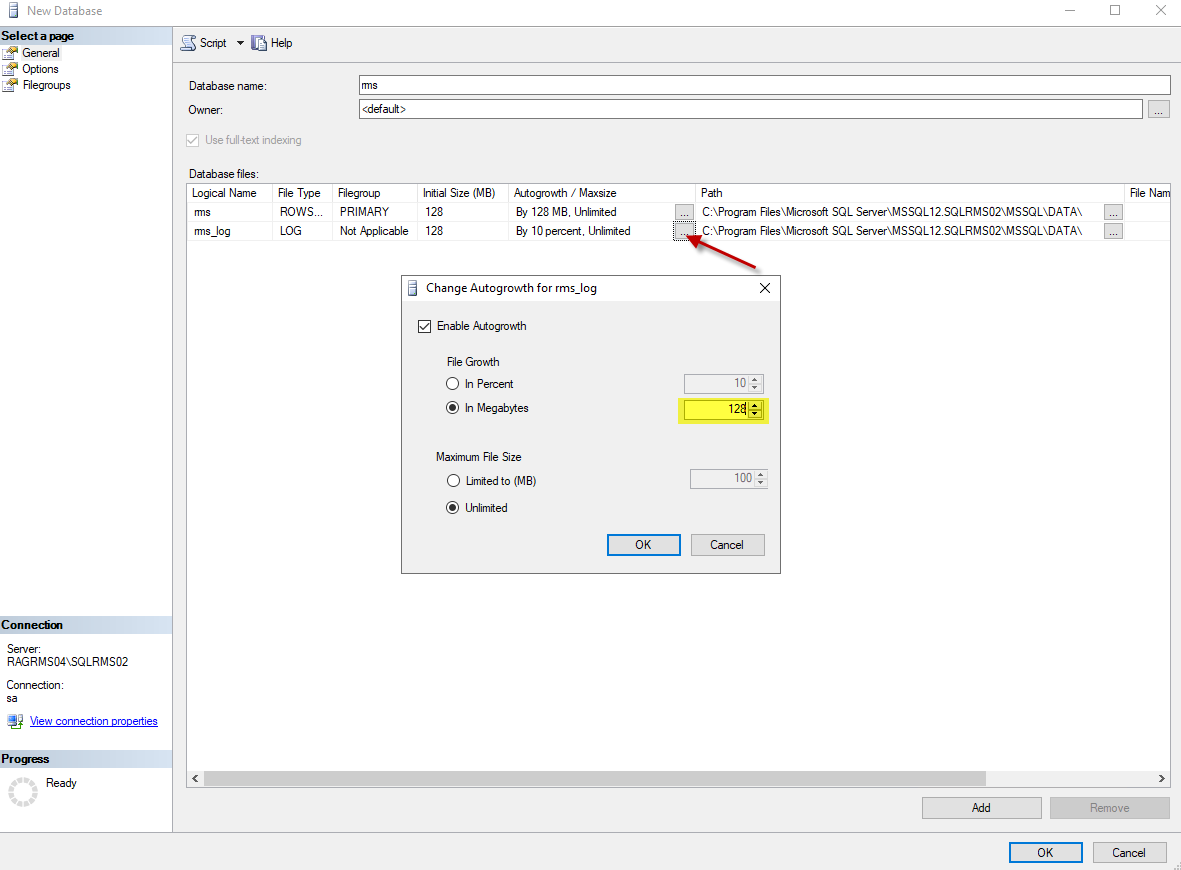 Click on OK. |
| Step 5 | Create a user for the database login. Got to "Security" and expand. Right click on "Logins" and select a "New login". 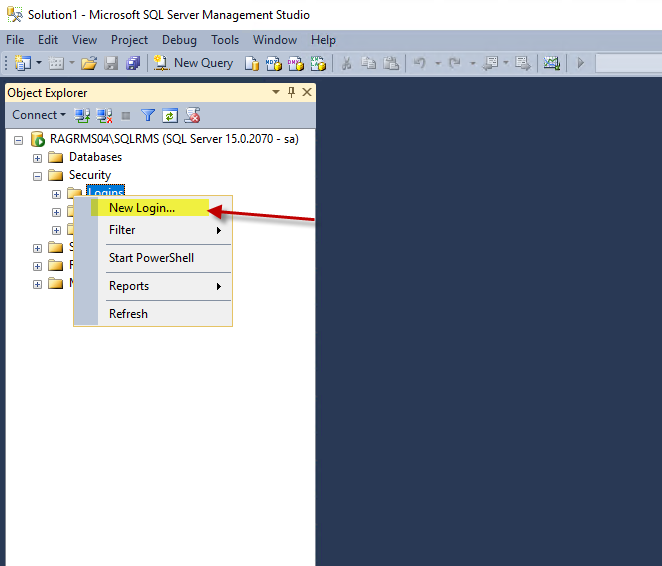 |
| Step 6 | General: Add the login data for the SQL database user. Remove the enforce password policy. Recommendation: - Login name: rmsUser - SQL Server authentication password: Rotronic123 IMPORTANT: - This user login must be specified later for the WebService so that the RMS server software can access the database. - Use only letters and numbers for the password. The password will be used when installing the server software. Special characters could create a conflict. - Default database: rms Click "Server Roles". 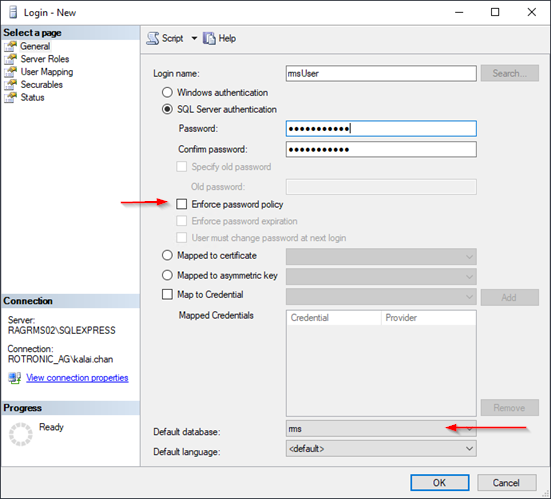 |
| Step 7 | Server Roles: Select the "Public" role. Click "User Mapping". 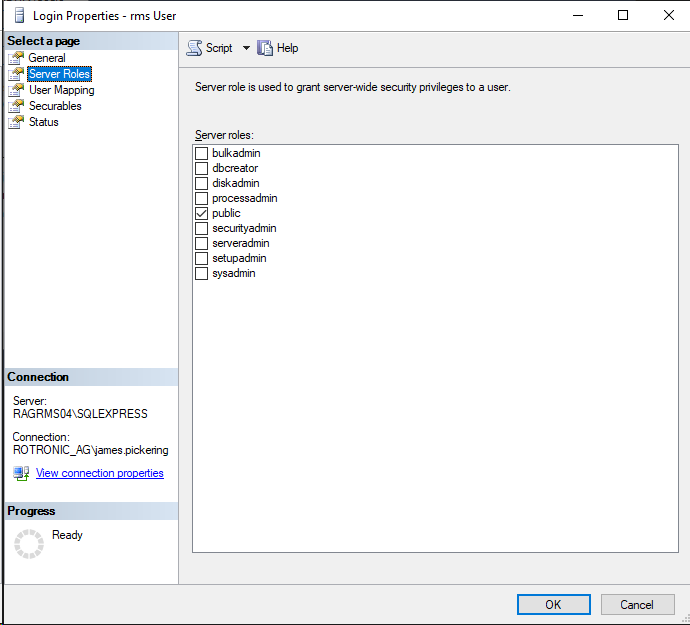 |
| Step 8 | User Mapping: Select "rms" in users mapped to this login. Select "db_datareader" and "db_datawriter" as well as "Public" from the database role membership for: rms. Click "OK". Configuration of the database is finished.  |